Chrome DevTools, JS and jQuery
By the end of this section I’d like everyone to accustom themselves with the capabilities of JavaScript (JS) and the jQuery library, both of which have become incredibly practical within the past few years. We can’t cover everything in JS as the possibilities are infinite (as is the case with any programming language) but I’d like to embark on getting started with them.
JS has evolved from a client-side scripting language to a full-fledged programming language as a result of the extensive adoption of the language in web sites, web applications and mobile applications. You can now create your own native iOS and Android mobile apps using JS with a framework such as Ionic. Other JS frameworks to develop dynamic websites include ReactJS, Vue.js and AngularJS.
1. Google Chrome’s DevTools / Console
Firstly before we dive into JS and jQuery I’d like us all to become familiar with the Inspector/Console within our web browsers. Throughout this section I’m going to assume we’re all using Google Chrome; you can find the counter-part feature in your preferred browser, but if not then please use Chrome for this section.
The console will aid us drastically in our development as we can manipulate the DOM (the HTML structure of the page), change CSS styling directly in the browser whilst seeing changes in real-time, test our site on multiple mobile devices and screen resolutions along with a host of other features.
To open the Console (or DevTools as Google refers to it as), click the Chrome Menu in the upper-right-hand corner of the browser window and select ‘More Tools > Developer Tools’ (or alternatively, right click anywhere on the page and select ‘Inspect’).
A window pane will now appear inside your browser. You can change the position of the pane by docking it on any corner of your screen, like so (notice the pop-out menu on the right):
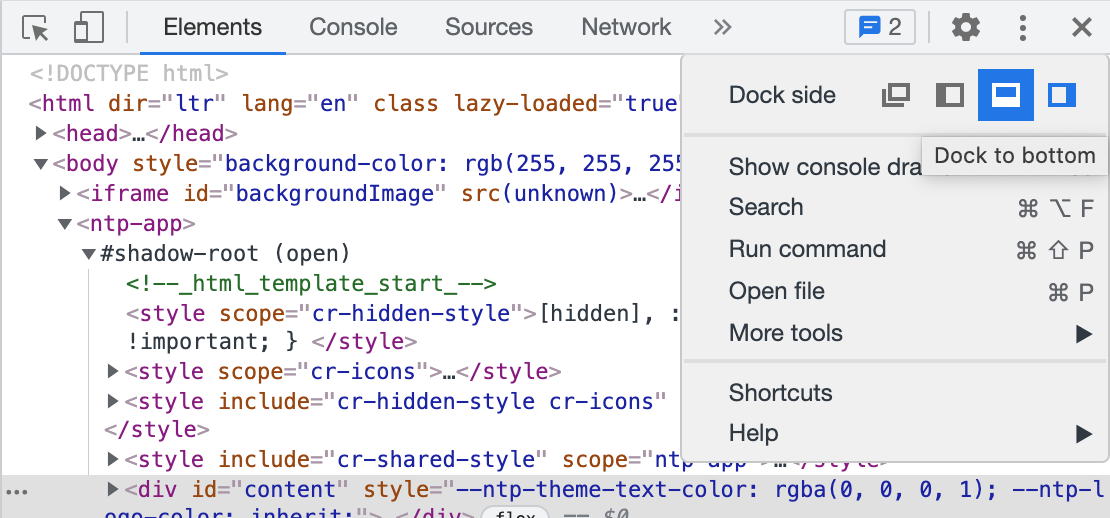
You will also notice two icons on the top left in the above screenshot, although small they’re both important features. Let’s get started by clicking the second icon, which is to load the device simulator. Upon clicking it, you will be presented to a screen similar to the one below.
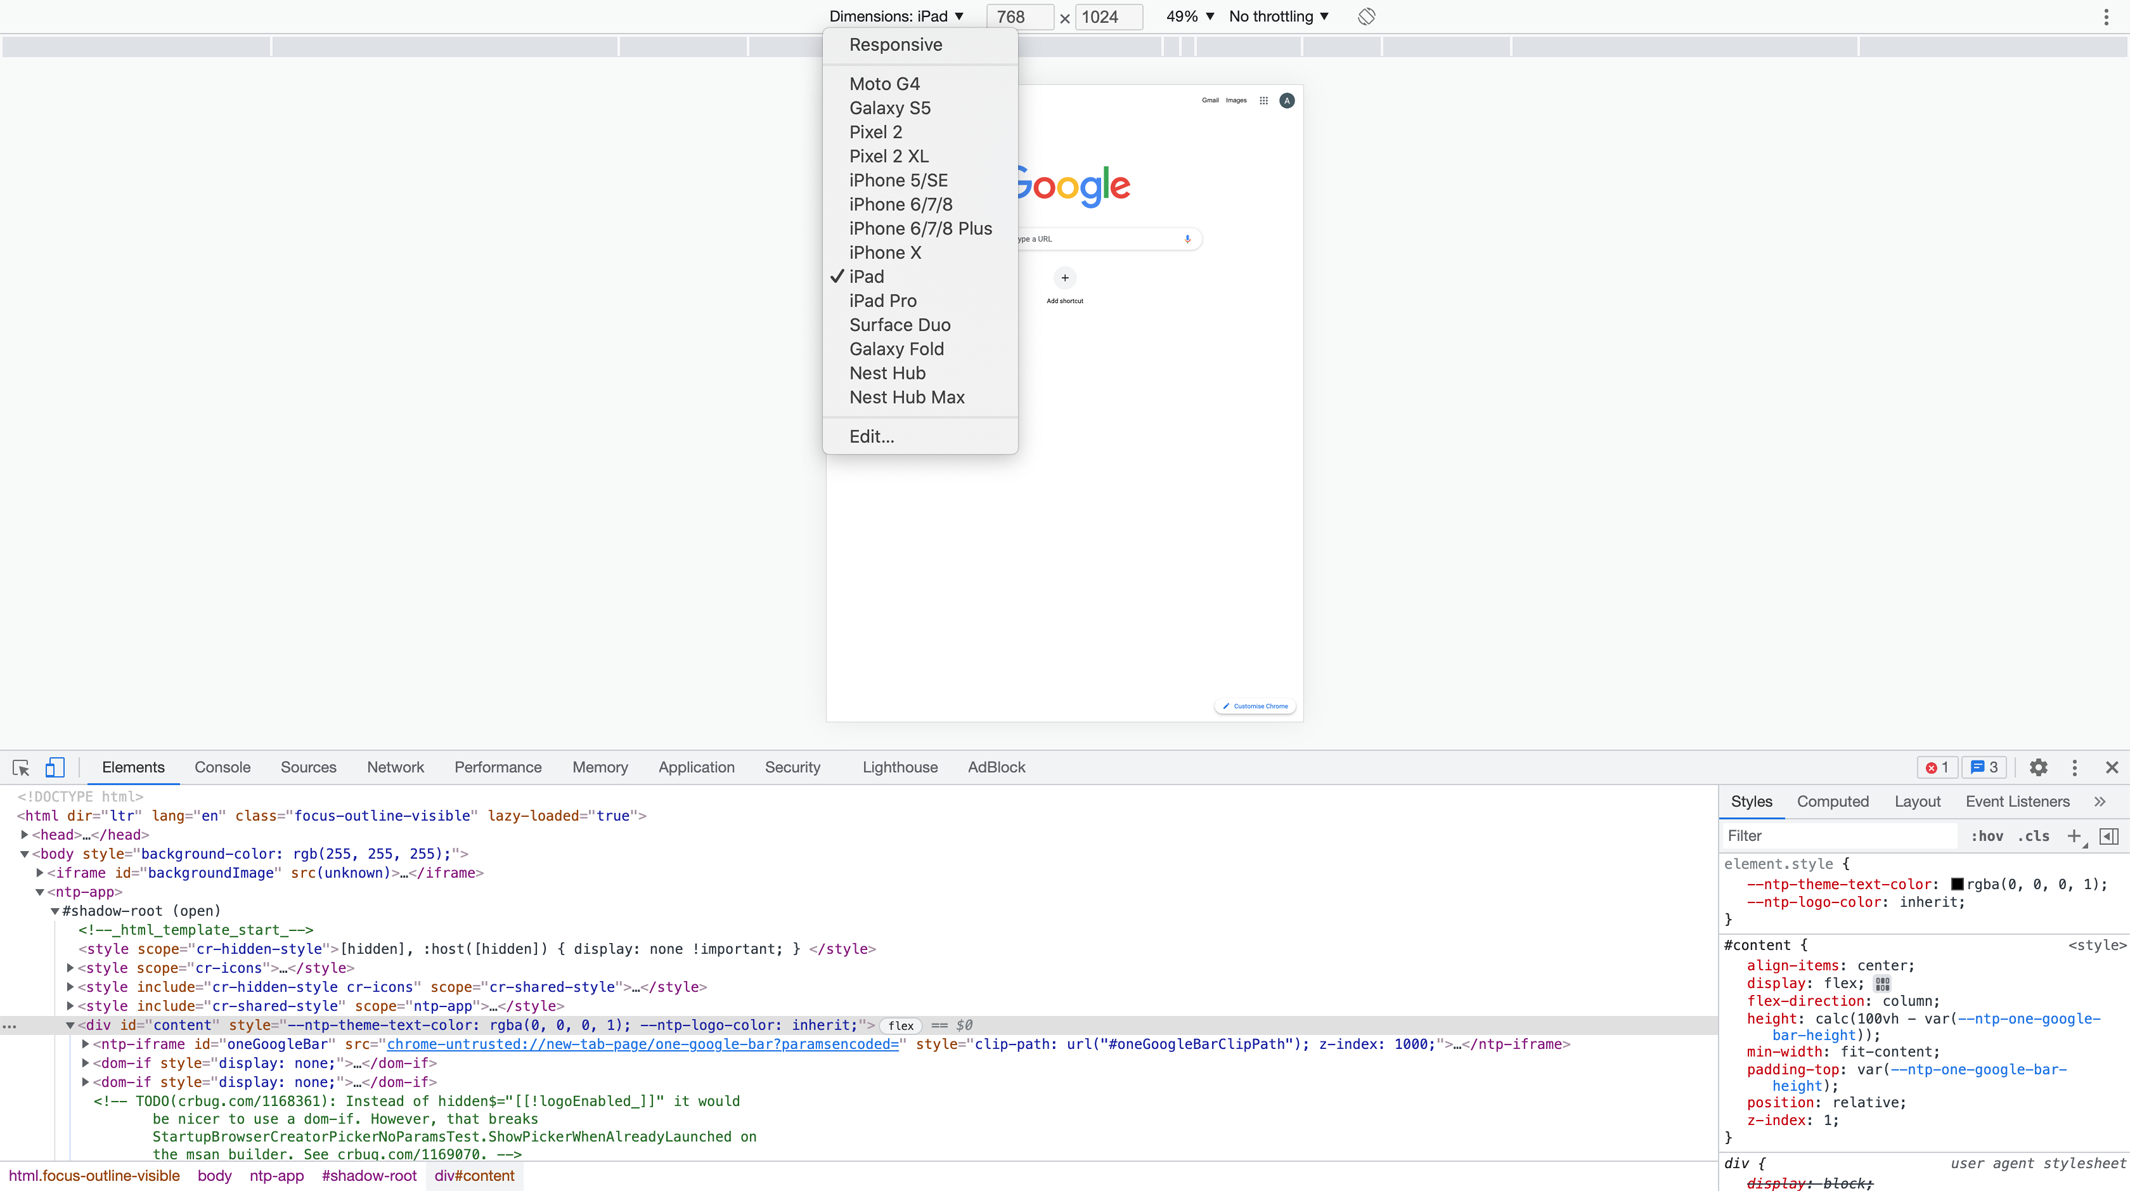
You can change the simulated device you’re viewing the current website on by selecting a device from the drop-down at the top bar of the simulator. This bar also provides the ability to rotate the device, adjust zoom levels and etc. If you look at the same bar all the way across to the right, you will see a menu button. If you click this it will also present additional features, one which you may find handy from time to time is the ‘Capture full size screenshot’. This will take a screenshot of the entire web page, so you don’t need to take multiple screenshots and stitch them together. You don’t need to do this now, but it is a useful feature if you ever need in the future.
Using the device simulator is an excellent way to test if the web page you’re developing is responsive and viewable on multiple mobile devices. To exit the simulator, click the device icon (highlighted in blue) again on the top-left of the console.
You can also modify the current page’s code using the ‘Elements’ tab which has appeared in the DevTools. To the left of the device icon (which loaded the device simulator) is a cursor icon, when you select this it will allow you to click on any element on the page and the code for that element will be highlighted in the console. You can then modify the code or the CSS styling options. You can add CSS styling to elements on the right hand-side in the above screenshot (this maybe at the bottom for you if you haven’t changed the DevTools’ dock position).
You can modify the code for any web page you visit (you don’t have to be the page owner), however these changes will only be presented to you. When you reload the page, all the changes which you’ve made in the console will be reset as the changes are not permanent. To make changes permanent, you need to alter the code using your IDE (e.g. Atom) and saving the changes there.
Finally in the DevTools, I’d like you to take a look at the ‘Console’ tab. This will be useful for us when we develop in JS; we can print debugging messages into the console. You can also feel free to take a look at all the other tabs and experiment.
2. Using console.log() in your JS Code.
To begin experimenting with the console.log feature, I’d like you to give it a try. You can add the following into your JS file (i.e. your file with the .js extension):
This will print ‘Hello World!’ within the DevTools in the ‘Console’ tab (you will need to refresh your page to see the changes). Instead of printing ‘Hello World!’ we can also pass in JS variables, like so:
Other useful scenarios of console.log include inside if statements, e.g.
The above example will illustrate to us in our DevTools which part of the if statement executed. This provides us with visibility of our JS code and what is actually occurring behind the scenes. Similarly to how we can visualise our HTML and CSS changes, the console will allow us to visual to some degree our JS code.
3. Utilising JS and jQuery to Generate a Random Number
Using our project from the previous lessons we've commited to Git, I’d like you to implement some JS. The capabilities of JS (similar to any other programming language) are infinite. You can build any type of functionality, but we’ll be starting off with some basics.
First I’d like you to build a random number generator. To do this you’re going to need to first add a button (you can use Bootstrap) to your web page using HTML. Each time the button is clicked a random number should be generated. The number should also be presented on your web page. To present the number from JS to your HTML, you can utilise jQuery to do this for you.
For example (your HTML may look something like):
And in JS using jQuery you can do:
You can populate the contents of the first div using jQuery like so:
Notice in jQuery how we’ve identified one <div> with the dot prefix (i.e. .button), whereas another we’ve used a hash (i.e. #random-number). Any HTML elements with the id attribute are prefixed with a hash, and any class attributes are prefixed with a dot. So in the above example, the button div is recognised as .button, and the random-number div is recognised as #random-number. When should you use an ID vs a Class? All IDs on your page should be unique, whereas you can use the same class multiple times; therefore using ID is great for sections of a page, e.g. news, contact us and etc.
For this task I’ve not quite explained in step-by-step detail how to build the logic. So if you don’t already know how to build the JS functionality, you may need to do some research. Hint: JS provides a random method.
4. Random Quote Generator
I’d like you now to advance your random number generator code to instead of returning a random number, to return a random quote. For example:
"The ones who are crazy enough to think they can change the world, are the ones who do." - Steve Jobs.
To do this, I’d like you to gather some quotes by people (can be any) and store them in your JS code as an array. (Arrays in programming are a method of storing multiple values.) Then using your existing JS random number generator code, return a quote instead of a number.
So when the button is clicked, a random quote is now returned to the end-user.
5. Creating a Rock, Paper, Scissors Game using JS/jQuery
At this stage I’d like you to advance a little further to make a Rock, Paper, Scissors game vs the computer. (You should create this as a new section on your page and keep your random quote generator code.) To create the game, you can do this by:
- Using a HTML button, when clicked an item (rock, paper or scissors) should be assigned to the user randomly.
- The computer (i.e. JS) will then also be randomly assigned an item (rock, paper or scissors).
- You should then determine whether the user or computer has won.
- A message should be returned to the user denoting the users’ and computer’s item and whether the user or computer won.
For this to work, you’ll need to implement some rules in JS to denote which item wins over which; e.g. paper beats rock, rock beats scissors, scissors beats paper. You can be as advanced as you like with implementing the rules, or an if/switch statement will suffice.
From all the above, you can see how a scripting language such as JS (amongst other programming languages) can develop any type of functionality. This is how we are able to develop business and large scale applications (they’re not as difficult as they seem once we get into it).
The tasks in this section maybe more challenging than usual as you’ll need to do some of your own research and apply your own logic in scripting/programming. This is generally the norm in programming, as it is primarily based on implementing logic.
Useful resources:
Author(s)

Arif Ullah
Developer & CEO